Have important dates coming up that you want to highlight? Want to share a training schedule with your new hires in your onboarding slideshow? You can create a calendar in PowerPoint in just minutes.
Whether you’d be happy to use a template or prefer to get creative and make one from scratch, we’ll show you how to make a calendar in PowerPoint.
{toc}
Use a PowerPoint calendar template
One simple way to create a calendar in PowerPoint is using a template. I know what you’re thinking, “I could have thought of this myself.” But honestly, this is the quickest and easiest way to make a calendar in PowerPoint. And luckily, Microsoft provides some useful and beautiful calendar templates.
In PowerPoint
- Open PowerPoint and select New.
- Enter “calendar” in the template Search box and you’ll see a collection of options.
- Choose one and click Create to open and customize it in PowerPoint.

On the web
- Visit Microsoft Create and search for PowerPoint Calendar templates.
- You’ll then see a nice selection which is a little bigger than the options in PowerPoint itself. Before choosing one, hover your cursor over it to see the additional calendar slides.
- Then, make sure you see the PowerPoint logo in the corner to confirm it’s for PowerPoint.

- Pick the template you want, and you’ll see options to Customize in PowerPoint on the web or Download it to PowerPoint on your desktop.

Just to show how easy it is to create your calendar in PowerPoint on the web, we pick that option and see our cool animal-themed calendar with a slide for each month.
Once the calendar opens, you can change fonts, colors, sizes, and even images if you like.

Create a PowerPoint calendar from scratch
If you prefer to make your own calendar and have the time to do so, this is always an option. The benefit of creating your own PowerPoint calendar is that you can completely customize it from start to finish.
So, if you want to let your creativity flow, here are the steps to make a one-month calendar from scratch along with how to format it.
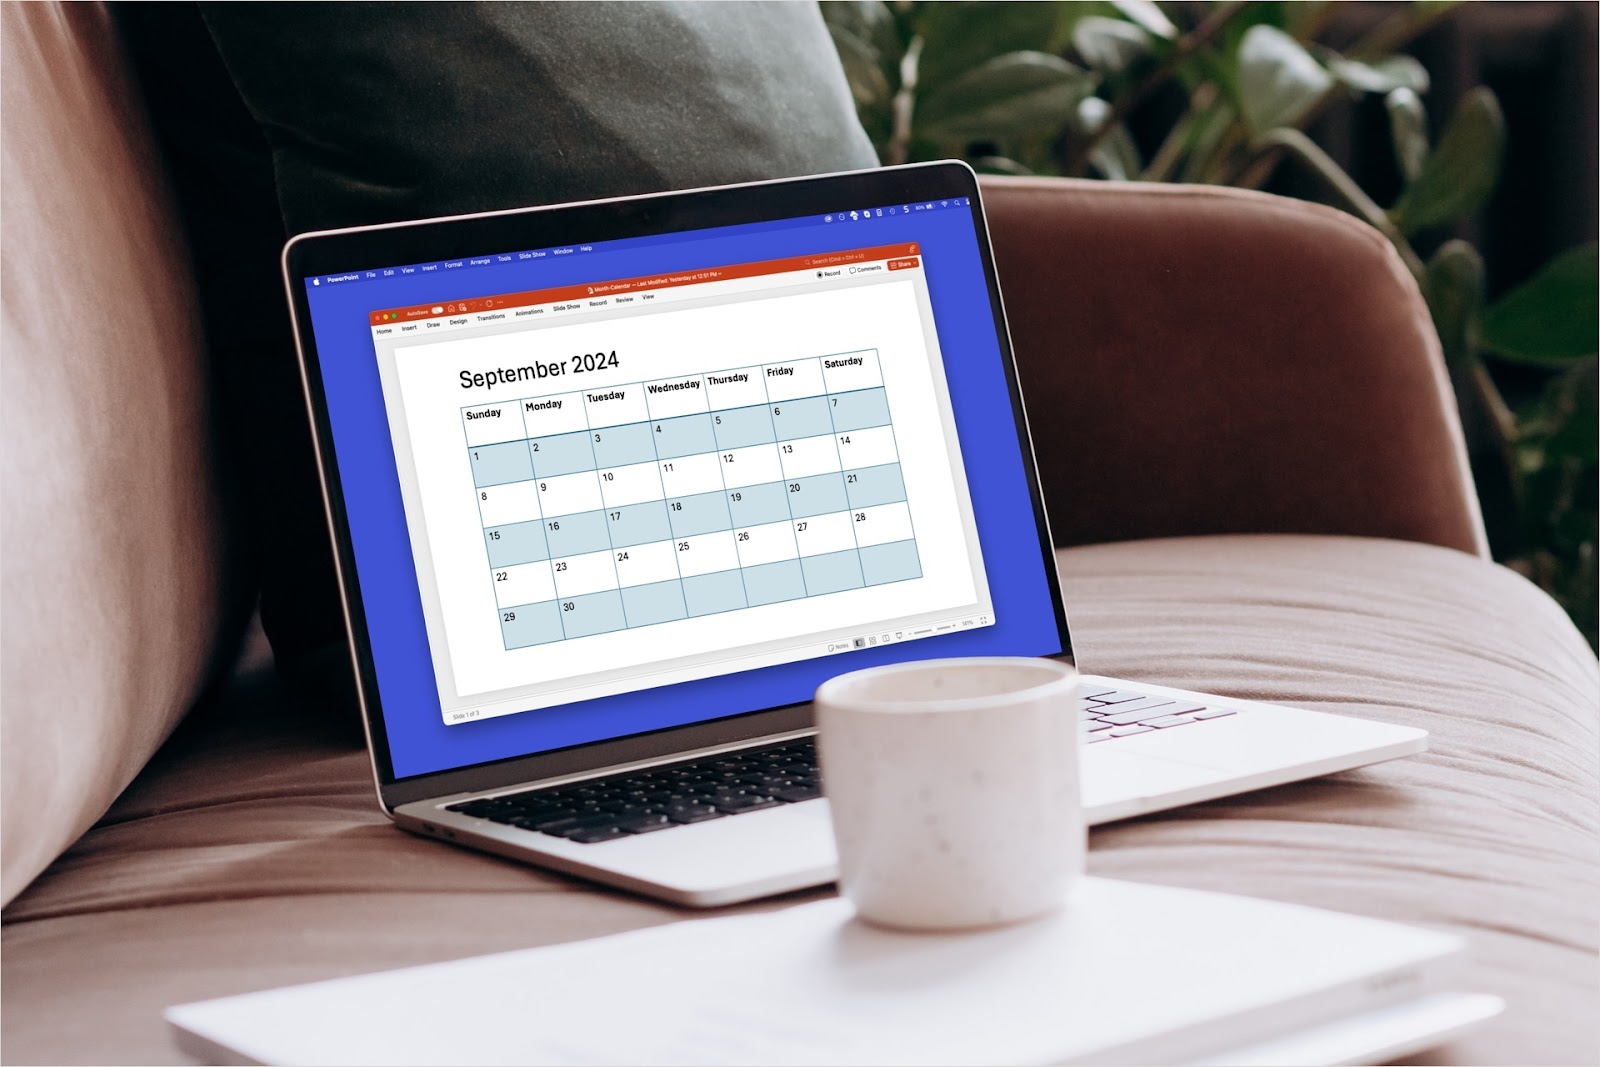
1. Build the calendar table
- Select the slide for the calendar or add a new Blank slide using the Home or Insert tab.
- Head to the Insert tab and open the Table menu. Drag to create a 7 x 6 table.

- You’ll likely see some preformatting on the table like colors, banded rows, and borders. But don’t worry about that because we’ll be changing it later.
- Optionally, enter the days of the week in the top row of the table. You can start with Sunday or Monday per your preference.

- Add the dates to the remaining rows. For our example, we’re using September 2024 and the first day of the month is on a Sunday.

Tip: Did you know that you can also create a table of contents in PowerPoint?
2. Format the calendar table
Now that you have the base for your calendar, you can format it to your liking. You can change the font, apply a style, resize the calendar, insert the month and year, include a background, and more.
You’ll use the Table Design and Table Layout tabs to customize the calendar table and the other tabs for additional changes.
We’ll walk through two examples to give you some ideas for your own calendar. We’ll start with a basic calendar that resembles one you’d see on a wall or in a calendar app. We’ll then format a more appealing fancy calendar. Both use the base table described above.
Format a basic calendar
For a simple calendar you can refer to during your presentation, we’ll turn our default table into a business-style calendar.

- Select the table and move it down slightly to make room for the month and year.
- Go to the Insert tab, select Text Box, and enter the month and year in the box. Then, drag the text box to the left.

- Select the bottom edge of the table and drag it downward to make it longer.

- Go to the Table Design tab, open the Table Styles box, and choose Light Style 3 – Accent 1 or a style of your choice.

- Select the text box containing the month and year. Go to the Home tab and change the Font Size to 40. Note that you may have to adjust the position of the text box.

And that’s it! You just created a nice and simple calendar for your slideshow.

Tip: Google app fan too? Learn how to share a Google Calendar.
Format a fancy calendar
For a more attractive calendar, we’ll turn our default table into a smaller calendar and place it on a lovely background.

- Select the first row of the table with the day names, go to the Table Layout tab, and choose Delete Rows in the Delete menu.

- Resize the table by dragging the edges or go to the Table Layout tab and enter the size. We’re using Height: 4 and Width: 5.3.

- Go to the Insert tab, select Text Box, and enter the month in the box. Then, drag the text box to the right.

- Select the text box, go to the Home tab, and change the Font to Fairwater Script, Size 40 or a style and size of your choice.

- Select the table, go to the Table Design tab, and choose No Style, No Grid in the Styles box.

- Select the text in the table, go to the Home tab, and change the Font to Fairwater Script or a style of your choice.

- Go to the Design tab and select Format Background. In the sidebar that opens, choose Picture or texture fill and click Insert below Picture Source.

- You can then pick any picture you like. For our slide, we choose Stock Images, search for “Giraffes,” and Insert a great picture.

And there you go --- you have an attractive calendar that can easily compete with Microsoft’s calendar templates!

3. Duplicate and update the calendar slide
If you want to create a slide with a calendar for each month, you don’t have to start from scratch every time. You can just duplicate the slide and then update the actual calendar.
- Open the side panel on the left to display the thumbnails. Right-click the calendar slide and select Duplicate Slide.

- When the slide copy appears, update the calendar depending on which type you create. For example, here we change both the month and location of the dates.

- Continue this process to duplicate and update the remaining slides. You can also make further changes if you like such as using a different color or background for each month.

Tip: Want to mix other slides with your calendar? Look at how to combine PowerPoints.
Start with slideshow templates using Plus AI
As mentioned, using templates can give you quick starts to tasks. With Plus AI, you can create a new slideshow using an eye-catching template. Not only that, but you can instruct Plus AI to craft the content for your presentation too.
Not everyone enjoys building slideshows and there are others who love the creation process but are limited on time. For these situations, Plus AI can be a real time-saver. From research and content to assembly and appearance, you can set up a slideshow in mere minutes.

Check out the Plus AI website for complete details. You can use the tool with both Microsoft PowerPoint and Google Slides for preparing presentations in either application.
FAQs
How to create a schedule in PowerPoint?
To go along with your calendar, you can insert a schedule or timeline on a PowerPoint slide. And luckily, this is a built-in feature. On the Insert tab, choose SmartArt. Select Process on the left and you’ll see a couple of timeline diagram options on the right.
Does Excel have a calendar template?
Yes, both Excel and Word can use Microsoft calendar templates. Visit Microsoft Create or use this direct link to the calendar templates. You can then open the template you like in Excel on the web or download it to your desktop.
How do I make a printable calendar?
After you create your calendar in PowerPoint, you can select File > Print. You’ll see each slide as a page. So, you can print the entire slideshow full of one-month calendar pages.
If you like, you can increase the size of each calendar before you print the slideshow. This is handy if you want more room to jot down appointments or events on the dates.